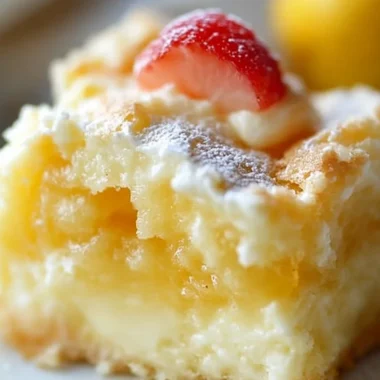
Key Lime Pie Bars – Browned Butter Blondie is an amazing dessert that marries the tangy flavors of classic key lime pie with the rich, nutty notes of browned butter blondies. This unique twist is more than just a dessert; it’s a delightful experience that will make your taste buds dance with joy. Each bite offers a harmonious blend of sweetness and tartness, making these bars an instant favorite at gatherings or as a treat for yourself.
Imagine the chewy texture of blondies, infused with the subtle richness of browned butter, topped with a creamy key lime filling that comes alive with its zesty flavor. Whether you’re enjoying them at a summer picnic or during family game night, these Key Lime Pie Bars will impress everyone. This guide will walk you through every aspect of this incredible dessert, providing tips and insights to ensure you create something truly special.
If you’ve never tried key lime pie bars with a blondie base, now is the time. The combination may sound unusual, but it’s a brilliant fusion worth discovering. Each layer offers a new taste sensation, where the buttery blondie harmonizes beautifully with the refreshing key lime topping. Get ready to unleash your inner baker and create something extraordinary with this recipe!
Why You’ll Love This Recipe
Key Lime Pie Bars – Browned Butter Blondie combines flavors and textures that result in a delightful dessert experience. Here are several reasons that will make you fall in love with this amazing recipe:
1. Unique Flavor Profile: The tartness of key lime juice balances perfectly with the sweetness of the blondie base, creating a dessert that’s both refreshing and satisfying.
2. Simple Ingredients: Most of the ingredients are pantry staples, making it easy to whip up this bar when you crave something sweet.
3. Versatile Dessert: These bars are perfect for any occasion, whether it’s a summer BBQ, birthday parties, or a cozy night in.
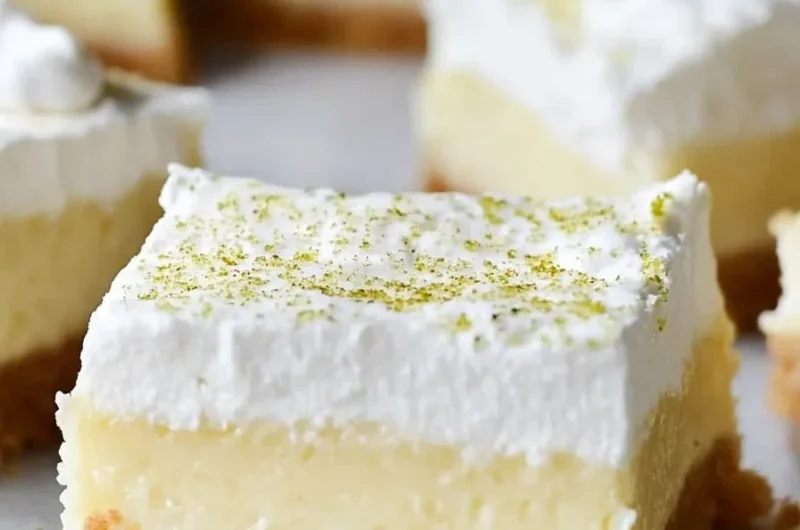
4. Impressive Presentation: With their vibrant color and layered look, these bars will captivate your guests visually.
5. Easy Preparation: The step-by-step instructions will guide both novice and experienced bakers to success.
6. Textural Delight: The chewy blondie base contrasts wonderfully with the creamy, tart key lime filling.
With these enticing elements, it’s clear why this dessert is a must-try. Each layer is designed not just for taste but to evoke feelings of joy and delight!
Preparation and Cooking Time
Preparing Key Lime Pie Bars – Browned Butter Blondie is a rewarding endeavor. Here’s a breakdown of the time you’ll need to execute this delicious recipe:
– Preparation Time: 30 minutes
– Cooking Time: 25-30 minutes
– Cooling Time: 2 hours (for best results)
Total time: Approximately 3 hours (allowing for cooling). These times may vary slightly depending on your kitchen setup and experience, but this framework should serve you well.
Ingredients
– 1 cup unsalted butter
– 1 ½ cups brown sugar, packed
– 2 large eggs
– 1 tablespoon vanilla extract
– 2 cups all-purpose flour
– ½ teaspoon baking powder
– ¼ teaspoon salt
– Zest of 2 limes
– ½ cup key lime juice (fresh or bottled)
– 1 can (14 ounces) sweetened condensed milk
– Extra lime zest, for garnish
Step-by-Step Instructions
Creating these luscious Key Lime Pie Bars – Browned Butter Blondie involves several straightforward steps:
1. Preheat the oven: Set your oven to 350°F (175°C). Grease a 9×9 inch baking pan or line it with parchment paper for easy removal.
2. Brown the butter: In a medium saucepan, melt 1 cup of unsalted butter over medium heat. Stir frequently until it turns golden brown and develops a nutty aroma. Remove from heat and let it cool slightly.
3. Mix the blondie base: In a large bowl, combine the browned butter and brown sugar. Mix well until smooth. Add the eggs one at a time, followed by the vanilla extract, stirring to combine.
4. Add dry ingredients: In a separate bowl, whisk together the flour, baking powder, and salt. Gradually add this mixture to the wet ingredients, mixing until just combined. Fold in the lime zest.
5. Bake the base: Pour the blondie mixture into the prepared baking pan, spreading it evenly. Bake in the preheated oven for 25-30 minutes or until golden brown and a toothpick comes out clean.
6. Prepare the key lime filling: While the blondies bake, whisk together the key lime juice and sweetened condensed milk in a bowl until well mixed.
7. Add key lime filling: Remove the blondies from the oven once baked. Pour the key lime mixture over the top while it’s still warm. Return to the oven and bake for an additional 10-12 minutes.
8. Cool completely: Allow the bars to cool in the pan on a wire rack, then refrigerate for at least 2 hours before cutting into squares.
How to Serve
When it’s time to enjoy your Key Lime Pie Bars – Browned Butter Blondie, consider the following tips for serving:
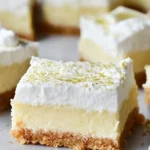
1. Presentation: Cut the bars into even squares and arrange them on a beautiful serving platter. Consider garnishing with additional lime zest for a pop of color.
2. Pairing Options: These bars pair beautifully with a dollop of whipped cream or a scoop of vanilla ice cream to balance the tartness.
3. Garnish: A sprinkle of sea salt or a lime wedge can add an extra touch of sophistication.
4. Beverage Pairing: Serve them with iced tea, lemonade, or a light dessert wine for an elevated experience.
5. Storing: These bars can be stored in an airtight container in the fridge for up to a week, making them perfect for meal prep or as a quick snack throughout the week.
With these thoughtful serving ideas, you’re guaranteed to impress your family and friends with the delightful taste and presentation of your Key Lime Pie Bars – Browned Butter Blondie! Enjoy your well-deserved creation!
Additional Tips
– Use Fresh Limes: For the best flavor, always opt for fresh limes. Their bright zest and juice give a more vibrant taste compared to bottled options.
– Let the Blondie Cool before Adding Topping: Allow the blondie base to cool slightly before adding the key lime filling. This prevents the two layers from mixing together.
– Experiment with Sweetness: Depending on your preference, you can adjust the amount of sweetened condensed milk in the filling to make it sweeter or less sweet.
– Add More Zest: If you love lime, consider adding a bit more lime zest to the filling for an extra punch of flavor.
– Chill Thoroughly: For the best texture, ensure you refrigerate the bars for the recommended time. This will help the key lime filling set properly.
Recipe Variation
Feel free to switch things up! Here are a few variations to try:
1. Coconut Key Lime Bars: Add shredded coconut to the blondie base for a tropical twist. The coconut complements the key lime beautifully.
2. Chocolate Drizzle: For a decadent touch, melt some dark chocolate and drizzle it over the cooled bars before serving.
3. Gluten-Free Option: Substitute regular flour with a gluten-free baking mix to accommodate those with dietary restrictions.
4. Different Citrus: For a new flavor, replace the key limes with blood oranges or lemons. Each fruit brings a unique taste while still providing that citrusy zing.
5. Layered Delight: Create layers by alternating the blondie and key lime mixtures before baking for a marbled effect.
Freezing and Storage
– Storage: These Key Lime Pie Bars – Browned Butter Blondie can be stored in an airtight container in the refrigerator for up to a week. This makes them a convenient dessert option.
– Freezing: If you want to make them ahead of time, these bars can be frozen. Cut them into squares, wrap them individually in plastic wrap, and then place them in a freezer-safe bag. They can be frozen for up to three months.
– Thawing: To enjoy frozen bars, remove them from the freezer and let them thaw in the refrigerator overnight.
Special Equipment
To successfully prepare Key Lime Pie Bars – Browned Butter Blondie, you will need a few essential tools:
– 9×9 inch baking pan: This is the perfect size for the bars, ensuring they bake evenly.
– Medium saucepan: Ideal for browning the butter.
– Large mixing bowl: For combining the blondie ingredients.
– Wire rack: Useful for cooling the bars after baking.
– Mixing spoons: Have a few on hand for stirring and mixing ingredients.
Frequently Asked Questions
Can I use regular limes instead of key limes?
Yes, regular limes can be used, but the flavor profile will be slightly different. Key limes are smaller and provide a more distinct tartness.
How do I know when the bars are done baking?
The bars are done when the edges are golden brown and a toothpick inserted into the blondie base comes out clean.
Can I make this recipe vegan?
Yes, you can substitute the eggs with flax eggs and the butter with a plant-based alternative. Ensure that the sweetened condensed milk is vegan as well.
What can I do if my filling doesn’t set properly?
If the filling doesn’t set as expected, try returning the bars to the oven for a few more minutes. Ensure the edges are firm, as this indicates that the filling has cooked properly.
Are there any alternative toppings I could use?
Certainly! Fresh whipped cream or a sprinkle of toasted coconut makes a lovely addition. You could also garnish with thin lime slices for decoration.
Conclusion
Key Lime Pie Bars – Browned Butter Blondie offers a refreshing twist on traditional desserts. They perfectly combine the sweetness of blondies with the tangy brightness of a classic key lime pie. Whether served at a summer gathering or as a simple weeknight treat, these bars will be a highlight. With the tips, variations, and storage advice included, you are fully equipped to create these delightful bars. So, gather your ingredients, follow the steps, and savor the joy of sharing this tasty treat!
Key Lime Pie Bars – Browned Butter Blondie: An Incredible 7-Step Recipe
- Total Time: 1 minute
Ingredients
– 1 cup unsalted butter
– 1 ½ cups brown sugar, packed
– 2 large eggs
– 1 tablespoon vanilla extract
– 2 cups all-purpose flour
– ½ teaspoon baking powder
– ¼ teaspoon salt
– Zest of 2 limes
– ½ cup key lime juice (fresh or bottled)
– 1 can (14 ounces) sweetened condensed milk
– Extra lime zest, for garnish
Instructions
Creating these luscious Key Lime Pie Bars – Browned Butter Blondie involves several straightforward steps:
1. Preheat the oven: Set your oven to 350°F (175°C). Grease a 9×9 inch baking pan or line it with parchment paper for easy removal.
2. Brown the butter: In a medium saucepan, melt 1 cup of unsalted butter over medium heat. Stir frequently until it turns golden brown and develops a nutty aroma. Remove from heat and let it cool slightly.
3. Mix the blondie base: In a large bowl, combine the browned butter and brown sugar. Mix well until smooth. Add the eggs one at a time, followed by the vanilla extract, stirring to combine.
4. Add dry ingredients: In a separate bowl, whisk together the flour, baking powder, and salt. Gradually add this mixture to the wet ingredients, mixing until just combined. Fold in the lime zest.
5. Bake the base: Pour the blondie mixture into the prepared baking pan, spreading it evenly. Bake in the preheated oven for 25-30 minutes or until golden brown and a toothpick comes out clean.
6. Prepare the key lime filling: While the blondies bake, whisk together the key lime juice and sweetened condensed milk in a bowl until well mixed.
7. Add key lime filling: Remove the blondies from the oven once baked. Pour the key lime mixture over the top while it’s still warm. Return to the oven and bake for an additional 10-12 minutes.
8. Cool completely: Allow the bars to cool in the pan on a wire rack, then refrigerate for at least 2 hours before cutting into squares.
- Prep Time: 15 minutes
- Cook Time: 25-30 minutes
Nutrition
- Serving Size: 9 squares
- Calories: 300 kcal
- Fat: 13g
- Protein: 3g