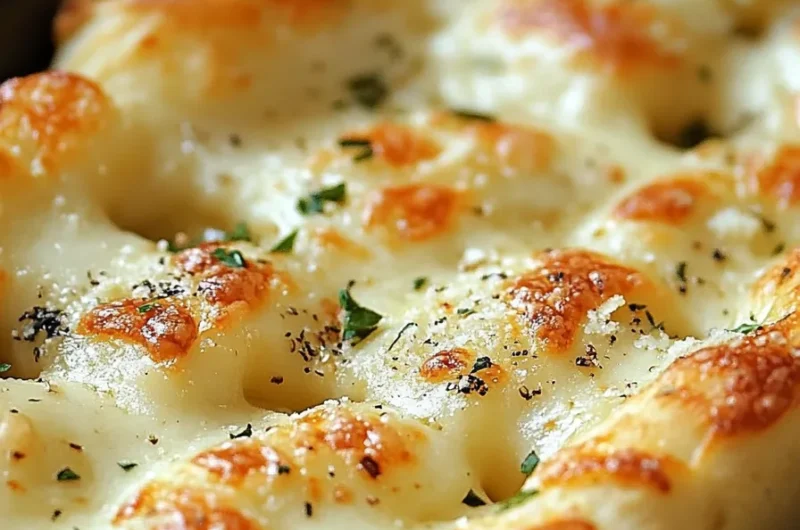
Homemade Cheesy Breadsticks are an incredible way to elevate your snack game. These delightful, warm, and cheesy delights make for the perfect accompaniment to any meal or a delicious stand-alone treat. Imagine pulling apart gooey, melted cheese from soft and golden crusts—sounds amazing, right? Whether you’re hosting a party, enjoying a cozy night in, or simply craving something comforting, these breadsticks are bound to impress.
Did you know that making your own cheesy breadsticks is not only easy but can also be a fun activity to do with family or friends? It’s a great way to bond over cooking while dishing out mouthwatering treats everyone will love. The aroma of freshly baked breadsticks wafting through your kitchen will have the whole household buzzing with excitement. Let’s explore this ultimate recipe that can make any gathering feel more special!
With its blend of simple ingredients, small prep time, and straightforward steps, this recipe leads to a wonderful outcome. You’ll find that once you make these Homemade Cheesy Breadsticks, they will quickly become a staple in your home. The following sections will take you through the reasons why this recipe stands out, how to prepare it, and how long it takes, along with serving suggestions.
Why You’ll Love This Recipe
Homemade Cheesy Breadsticks bring together various appealing aspects that make them a must-try for anyone. Here are some reasons why you’ll absolutely love this recipe:
1. Cheesy Goodness: The combination of ooey-gooey cheese and warm bread creates an irresistible flavor.
2. Quick and Easy: You can whip these up in no time, making them perfect for unexpected guests or last-minute snacks.
3. Versatile Base: You can easily customize the toppings according to your taste. Add herbs, spices, or different types of cheese!
4. Great for Sharing: These breadsticks are perfect for parties, movie nights, or family gatherings. Everyone loves them!
5. Kid-Friendly: Making breadsticks can be a fun activity for kids. They’ll enjoy helping out and, of course, eating the delicious results!
6. Leftover Friendly: If you happen to have some left, they are delicious reheated or enjoyed cold, making them a fantastic choice for meal prep.
These factors ensure that your Homemade Cheesy Breadsticks won’t just be another recipe; they’ll become a cherished experience everyone will look forward to.
Preparation and Cooking Time
In total, preparing Homemade Cheesy Breadsticks will take around 30 minutes. Here’s how that breaks down:
– Preparation Time: 15 minutes
– Cooking Time: 12-15 minutes
This concise time frame makes it easy to fit this recipe into even the busiest of schedules!
Ingredients
– 2 cups all-purpose flour
– 1 tablespoon instant yeast
– 1 teaspoon sugar
– 1 teaspoon salt
– ¾ cup warm water
– 2 tablespoons olive oil
– 1 cup shredded mozzarella cheese
– ½ cup grated Parmesan cheese
– 1 teaspoon garlic powder
– 1 teaspoon dried oregano (optional)
– Fresh parsley for garnish (optional)
Step-by-Step Instructions
Creating Homemade Cheesy Breadsticks can be a straightforward task if you follow these simple steps:
1. Preheat Oven: Begin by preheating your oven to 450°F (232°C).
2. Mix Dry Ingredients: In a large bowl, mix together the flour, instant yeast, sugar, and salt.
3. Add Wet Ingredients: Pour in the warm water and olive oil. Mix until a soft dough forms.
4. Knead the Dough: Transfer the dough onto a floured surface and knead for about 5 minutes until it’s smooth and elastic.
5. Let It Rise: Place the dough in a lightly greased bowl and cover it with a cloth. Let it rest for about 10 minutes.
6. Roll Out the Dough: After resting, roll out the dough into a rectangle about ½ inch thick.
7. Add Cheese: Sprinkle the shredded mozzarella and Parmesan cheese evenly over the surface of the dough. Make sure to cover it well!
8. Seasoning: Sprinkle garlic powder and oregano on top of the cheese for added flavor.
9. Cut into Sticks: Slice the dough into strips to form individual breadsticks.
10. Bake: Transfer the strips to a parchment-lined baking sheet and bake for 12-15 minutes, until golden brown.
11. Garnish: Optional – Once out of the oven, sprinkle freshly chopped parsley for an extra pop of color.
12. Serve Warm: Enjoy your Homemade Cheesy Breadsticks while they are warm!
Following these steps will lead you to delicious cheesy indulgence in no time at all.
How to Serve
To ensure your Homemade Cheesy Breadsticks make an impactful statement, consider the following serving tips:
1. Serve Fresh Out of the Oven: Breadsticks taste best when they are warm and fresh.
2. Accompany with Dipping Sauces: Offer marinara, ranch, or garlic butter on the side for an enhanced flavor experience.
3. Stylish Presentation: Arrange the breadsticks neatly on a platter. You can also place them in a tall glass for a fun visual effect.
4. Garnish Wisely: Use freshly chopped herbs like parsley or basil to decorate the platter. This adds a lovely aroma and improved visual appeal.
5. Perfect Pairing: These breadsticks can complement various dishes, including pasta, salads, or soups, or even stand alone as a snack.
By incorporating these serving suggestions, you will elevate the enjoyment of your Homemade Cheesy Breadsticks, making them a memorable treat for everyone.
Additional Tips
– Use Fresh Ingredients: Fresh cheese and high-quality flour can enhance the taste significantly. Opt for freshly grated cheese for a better melt.
– Experiment with Toppings: Don’t hesitate to try other toppings, such as jalapeños, sun-dried tomatoes, or crushed red pepper flakes for a bit of heat.
– Ensure Even Thickness: When rolling out the dough, aim for consistent thickness to ensure even baking. Uneven breadsticks can result in some being overcooked and others undercooked.
– Keep an Eye on Baking Time: Ovens can vary, so check the breadsticks a few minutes before the suggested time to prevent over-baking.
– Use Cornmeal: For extra texture, lightly sprinkle some cornmeal on the baking sheet before placing the breadsticks. This gives them a delightful crunch on the bottom.
Recipe Variation
Feel free to get creative with these Homemade Cheesy Breadsticks! Here are some tasty variations to try:
1. Herb-Infused: Mix fresh herbs like rosemary, thyme, or basil into the dough for an aromatic twist on flavor.
2. Cheesy Garlic Breadsticks: Increase the garlic powder or add minced garlic to the dough and on top for an intense garlic bread flavor.
3. Stuffed Breadsticks: Add a layer of cooked spinach or roasted garlic before the cheese for stuffed breadsticks bursting with flavor.
4. Sweet Breadsticks: For a dessert twist, substitute the cheese and garlic powder with cinnamon and sugar, adding a drizzle of icing after baking.
Freezing and Storage
– Storage: Keep Homemade Cheesy Breadsticks in an airtight container at room temperature for up to 3 days. They may lose some initial crispness but will still be delicious.
– Freezing: You can freeze the breadsticks for up to 2 months. Make sure they’re cooled completely before wrapping them tightly in plastic wrap and placing them in a freezer-safe bag.
– Reheating: For the best results, reheat the frozen breadsticks in the oven at 350°F (175°C) for about 10 minutes. This will help restore their crispiness.
Special Equipment
You don’t need many special tools to make these Homemade Cheesy Breadsticks, but having the following can be beneficial:
– Mixing Bowls: For combining the dough ingredients.
– Rolling Pin: To roll the dough evenly.
– Baking Sheet: A parchment-lined sheet works best for easy cleanup and even baking.
– Pizza Cutter or Knife: For cutting the dough into sticks without squishing them.
Frequently Asked Questions
Can I use whole wheat flour?
Yes! You can substitute whole wheat flour. Just be aware that the texture might be a bit denser than with all-purpose flour.
Can I make the dough ahead of time?
Definitely! You can prepare the dough a few hours in advance, cover it, and leave it to rise in the refrigerator. Just make sure to let it come to room temperature before rolling it out.
Are these breadsticks suitable for vegans?
You can make vegan cheese breadsticks by swapping out dairy cheese with plant-based cheese alternatives. Just ensure the other ingredients are also vegan.
How do I make them extra crispy?
Baking them a bit longer can help achieve that crispy texture. You can also brush the tops with melted butter or olive oil before baking.
What can I serve these breadsticks with?
These Homemade Cheesy Breadsticks pair well with marinara sauce, garlic butter, or your favorite dip. They also complement various dishes such as pasta, salads, and soups.
Conclusion
Creating Homemade Cheesy Breadsticks is not only simple but also incredibly rewarding. With their soft, cheesy centers and crispy exteriors, they are a delightful addition to any meal or gathering. These breadsticks will surely garner compliments and be a favorite for gatherings or cozy nights in. Embrace the joy of making and enjoying these cheesy delights, and they might even become a beloved family tradition!

Homemade Cheesy Breadsticks: An Amazing Ultimate Recipe
- Total Time: 59 minute
Ingredients
– 2 cups all-purpose flour
– 1 tablespoon instant yeast
– 1 teaspoon sugar
– 1 teaspoon salt
– ¾ cup warm water
– 2 tablespoons olive oil
– 1 cup shredded mozzarella cheese
– ½ cup grated Parmesan cheese
– 1 teaspoon garlic powder
– 1 teaspoon dried oregano (optional)
– Fresh parsley for garnish (optional)
Instructions
Creating Homemade Cheesy Breadsticks can be a straightforward task if you follow these simple steps:
1. Preheat Oven: Begin by preheating your oven to 450°F (232°C).
2. Mix Dry Ingredients: In a large bowl, mix together the flour, instant yeast, sugar, and salt.
3. Add Wet Ingredients: Pour in the warm water and olive oil. Mix until a soft dough forms.
4. Knead the Dough: Transfer the dough onto a floured surface and knead for about 5 minutes until it’s smooth and elastic.
5. Let It Rise: Place the dough in a lightly greased bowl and cover it with a cloth. Let it rest for about 10 minutes.
6. Roll Out the Dough: After resting, roll out the dough into a rectangle about ½ inch thick.
7. Add Cheese: Sprinkle the shredded mozzarella and Parmesan cheese evenly over the surface of the dough. Make sure to cover it well!
8. Seasoning: Sprinkle garlic powder and oregano on top of the cheese for added flavor.
9. Cut into Sticks: Slice the dough into strips to form individual breadsticks.
10. Bake: Transfer the strips to a parchment-lined baking sheet and bake for 12-15 minutes, until golden brown.
11. Garnish: Optional – Once out of the oven, sprinkle freshly chopped parsley for an extra pop of color.
12. Serve Warm: Enjoy your Homemade Cheesy Breadsticks while they are warm!
Following these steps will lead you to delicious cheesy indulgence in no time at all.
- Prep Time: 15 minutes
- Cook Time: 12-15 minutes
Nutrition
- Serving Size: 12
- Calories: 180 kcal
- Fat: 6g
- Protein: 7g