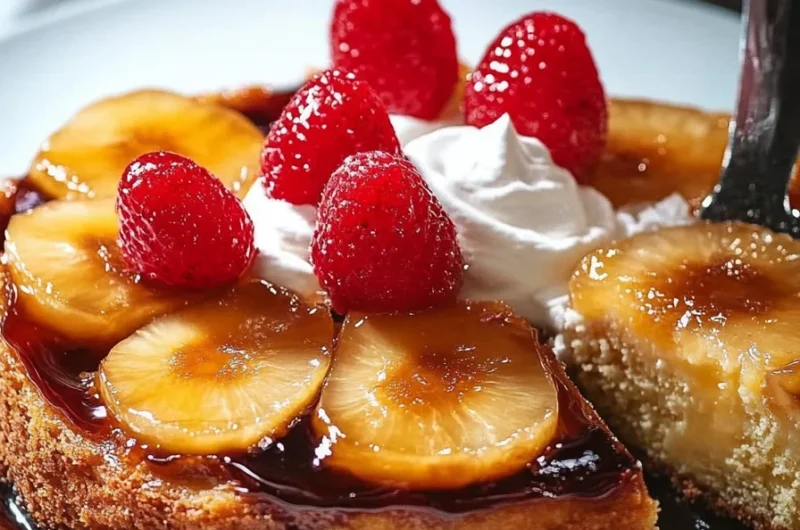
Pineapple Upside-Down Cake is a classic dessert that brings a sweet and tangy twist to the world of baking. With its gorgeous caramelized fruit topping and buttery, moist cake base, this recipe has been delighting taste buds for generations. The tradition of baking this cake dates back over a century, making it not only a delicious treat but also a nostalgic celebration of family gatherings and special occasions. The pineapple’s vibrant flavor pairs beautifully with the rich butter and brown sugar, creating an unforgettable taste experience.
Have you ever experienced the warm, gooey sensation of pineapple slices nestled atop a fluffy cake? The contrasting textures and flavors make Pineapple Upside-Down Cake a delightful confection that transcends the ordinary. It’s as much about the visual appeal as the flavor, offering a stunning presentation that will impress your guests. Cars and culinary historians alike praise its wonderful history and versatility, which only add to its charm.
This cake is not only perfect for summer barbecues but also suitable for birthdays and brunches. Its deliciousness is matched only by how easy it is to prepare. In this comprehensive guide, you’ll learn why Pineapple Upside-Down Cake is truly special, how to make it, and tips on serving it expertly. Let’s embark on this exciting culinary adventure to create a dessert that will surely leave lasting smiles.
Why You’ll Love This Recipe
Pineapple Upside-Down Cake brings together a blend of flavors and textures that are irresistible. Here are some reasons to fall in love with this incredible dessert:
1. Quick and Simple: The ingredients are straightforward, and most are likely found in your pantry.
2. Bake in a Single Pan: Easy cleanup since everything bakes in one skillet or cake pan.
3. Ageless Appeal: This nostalgic cake is perfect for all ages and occasions.
4. Show-Stopping Presentation: The vibrant pineapple topping creates an impressive look.
5. Versatility: You can modify it with different fruits or even add nuts for an extra crunch.
6. Comforting and Delicious: The combination of caramelized pineapple with sponge cake offers a delightful harmony.
These features make Pineapple Upside-Down Cake a beloved classic in kitchens all over the world. Each bite is sure to evoke memories and joy, making it a must-have dessert!
Preparation and Cooking Time
Creating the Pineapple Upside-Down Cake will take approximately 1 hour and 10 minutes, including preparation, baking, and cooling. Here’s a breakdown of the time required:
– Preparation Time: 20 minutes
– Cooking Time: 30-35 minutes
– Cooling Time: 15-20 minutes
The time may vary slightly depending on your kitchen experience and equipment, but this timeline should help set your expectations.
Ingredients
– 1/2 cup (1 stick) unsalted butter
– 1 cup brown sugar, packed
– 1 can (20 ounces) sliced pineapple in juice, drained (reserve juice)
– maraschino cherries (optional)
– 1 1/2 cups all-purpose flour
– 1 cup granulated sugar
– 1/2 teaspoon salt
– 2 teaspoons baking powder
– 1/2 cup milk (use reserved pineapple juice to replace part of it if desired)
– 2 large eggs
– 1 teaspoon vanilla extract
Step-by-Step Instructions
Creating the Pineapple Upside-Down Cake can be fulfilling if you follow these simple steps:
1. Preheat Oven: Preheat your oven to 350°F (175°C).
2. Prepare Baking Dish: In a 9-inch round cake pan or skillet, melt the butter gently over low heat. Remove from heat and sprinkle the brown sugar evenly over the melted butter.
3. Arrange Pineapple: Place the drained pineapple slices on top of the brown sugar mixture. If desired, place maraschino cherries in the centers of the pineapple rings or around them.
4. Combine Dry Ingredients: In a large mixing bowl, whisk together the flour, granulated sugar, salt, and baking powder until well combined.
5. Mix Wet Ingredients: In another bowl, mix the reserved pineapple juice (if using), milk, eggs, and vanilla extract.
6. Combine Mixtures: Gradually add the wet mixture to the dry ingredients, stirring until just combined. Do not over-mix; a few lumps are okay.
7. Pour Batter: Carefully pour the batter over the pineapple layer in the cake pan, spreading it evenly.
8. Bake: Place the pan in the preheated oven and bake for 30-35 minutes, or until a toothpick inserted into the center comes out clean.
9. Cool: Allow the cake to cool in the pan for about 10-15 minutes, then carefully invert it onto a serving plate while still warm.
10. Serve: Let the cake cool slightly before slicing.
By following these straightforward steps, you’ll be on your way to creating this delectable cake effortlessly.
How to Serve
To make the serving of Pineapple Upside-Down Cake memorable, consider the following tips:
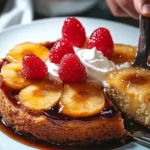
1. Presentation: A cake stand elevates its appearance. Display it attractively to capture attention.
2. Accompaniments: Serve with whipped cream or a scoop of vanilla ice cream to enhance the overall experience.
3. Slice Size: Cut generous slices, but keep them manageable. Smaller portions often inspire second helpings!
4. Beverage Pairing: Offering coffee or lemonade can heighten the enjoyment, especially during gatherings.
Thoughtful presentation and serving can transform your Pineapple Upside-Down Cake into an unforgettable centerpiece that will delight your guests!
Additional Tips
– Use Fresh Pineapple: If possible, opt for fresh pineapple instead of canned for a fresher taste and texture.
– Serve Warm: Pineapple Upside-Down Cake is best enjoyed warm. A quick reheat in the microwave can bring back its deliciousness.
– Customize Toppings: Feel free to add toasted coconut flakes or crushed nuts on top of the cake for added flavor and texture.
– Test for Doneness: Use a toothpick to check the center; it should come out clean when the cake is fully baked.
– Let It Rest: Allow the cake to cool in the pan for the recommended time to ensure the toppings stick well when inverted.
Recipe Variation
Explore these fun variations to personalize your Pineapple Upside-Down Cake experience:
1. Tropical Twist: Add slices of mango or kiwi along with the pineapple for an exotic flavor.
2. Nutty Delight: Incorporate chopped pecans or walnuts into the batter for a crunchy texture.
3. Coconut Version: Replace half of the butter with coconut oil and sprinkle shredded coconut over the pineapple layer.
4. Upside-Down Cupcakes: Use a muffin tin to make individual-sized cakes, perfect for parties or kid-friendly treats.
5. Flavored Cake Mix: Substitute the all-purpose flour with a flavored cake mix, such as vanilla or lemon, for a unique twist.
Freezing and Storage
– Storage: Keep the Pineapple Upside-Down Cake covered at room temperature for up to 3 days. For longer storage, refrigerate it for up to a week.
– Freezing: The cake can be frozen for up to 2 months. Wrap individual slices tightly in plastic wrap, then place them in an airtight container to avoid freezer burn. Thaw completely before serving.
Special Equipment
To make preparing your Pineapple Upside-Down Cake easier and more efficient, ensure you have the following tools on hand:
– 9-inch round cake pan or cast-iron skillet
– Mixing bowls (one for wet ingredients, one for dry)
– Whisk
– Rubber spatula for easy mixing
– Toothpick for testing doneness
Frequently Asked Questions
What can I do if my cake sticks to the pan?
Ensure you grease your pan thoroughly before adding the butter and brown sugar mix. If it still sticks, carefully run a knife around the edges to loosen it.
Can I make this cake gluten-free?
Yes! Substitute all-purpose flour with a gluten-free flour blend, and ensure your other ingredients are gluten-free as well.
Is this cake suitable for vegans?
You can modify the recipe by using a plant-based butter substitute, non-dairy milk, and flax eggs instead of chicken eggs.
How can I make the cake more flavorful?
Consider infusing spices like cinnamon or nutmeg into the batter, or add a hint of rum extract for a unique twist.
Can I add more fruit?
Absolutely! You can try layering sliced peaches, cherries, or even berries to enhance the fruity character of the cake.
Conclusion
Pineapple Upside-Down Cake is a delightful dessert that stands the test of time. Its combination of sweet, tangy pineapple, rich caramel, and light, fluffy cake invites everyone to indulge. Whether you serve it at family gatherings, parties, or simple weeknight dinners, this cake brings joy and a sense of nostalgia. It’s a versatile recipe that allows for creativity, making it perfect for any occasion. With this comprehensive guide, you are well on your way to mastering this classic dessert!
Pineapple Upside-Down Cake: An Amazing Ultimate Recipe
- Total Time: 59 minute
Ingredients
– 1/2 cup (1 stick) unsalted butter
– 1 cup brown sugar, packed
– 1 can (20 ounces) sliced pineapple in juice, drained (reserve juice)
– maraschino cherries (optional)
– 1 1/2 cups all-purpose flour
– 1 cup granulated sugar
– 1/2 teaspoon salt
– 2 teaspoons baking powder
– 1/2 cup milk (use reserved pineapple juice to replace part of it if desired)
– 2 large eggs
– 1 teaspoon vanilla extract
Instructions
Creating the Pineapple Upside-Down Cake can be fulfilling if you follow these simple steps:
1. Preheat Oven: Preheat your oven to 350°F (175°C).
2. Prepare Baking Dish: In a 9-inch round cake pan or skillet, melt the butter gently over low heat. Remove from heat and sprinkle the brown sugar evenly over the melted butter.
3. Arrange Pineapple: Place the drained pineapple slices on top of the brown sugar mixture. If desired, place maraschino cherries in the centers of the pineapple rings or around them.
4. Combine Dry Ingredients: In a large mixing bowl, whisk together the flour, granulated sugar, salt, and baking powder until well combined.
5. Mix Wet Ingredients: In another bowl, mix the reserved pineapple juice (if using), milk, eggs, and vanilla extract.
6. Combine Mixtures: Gradually add the wet mixture to the dry ingredients, stirring until just combined. Do not over-mix; a few lumps are okay.
7. Pour Batter: Carefully pour the batter over the pineapple layer in the cake pan, spreading it evenly.
8. Bake: Place the pan in the preheated oven and bake for 30-35 minutes, or until a toothpick inserted into the center comes out clean.
9. Cool: Allow the cake to cool in the pan for about 10-15 minutes, then carefully invert it onto a serving plate while still warm.
10. Serve: Let the cake cool slightly before slicing.
By following these straightforward steps, you’ll be on your way to creating this delectable cake effortlessly.
- Prep Time: 20 minutes
- Cook Time: 30-35 minutes
Nutrition
- Serving Size: 12 servings
- Calories: 230 kcal
- Fat: 10g
- Protein: 2g